
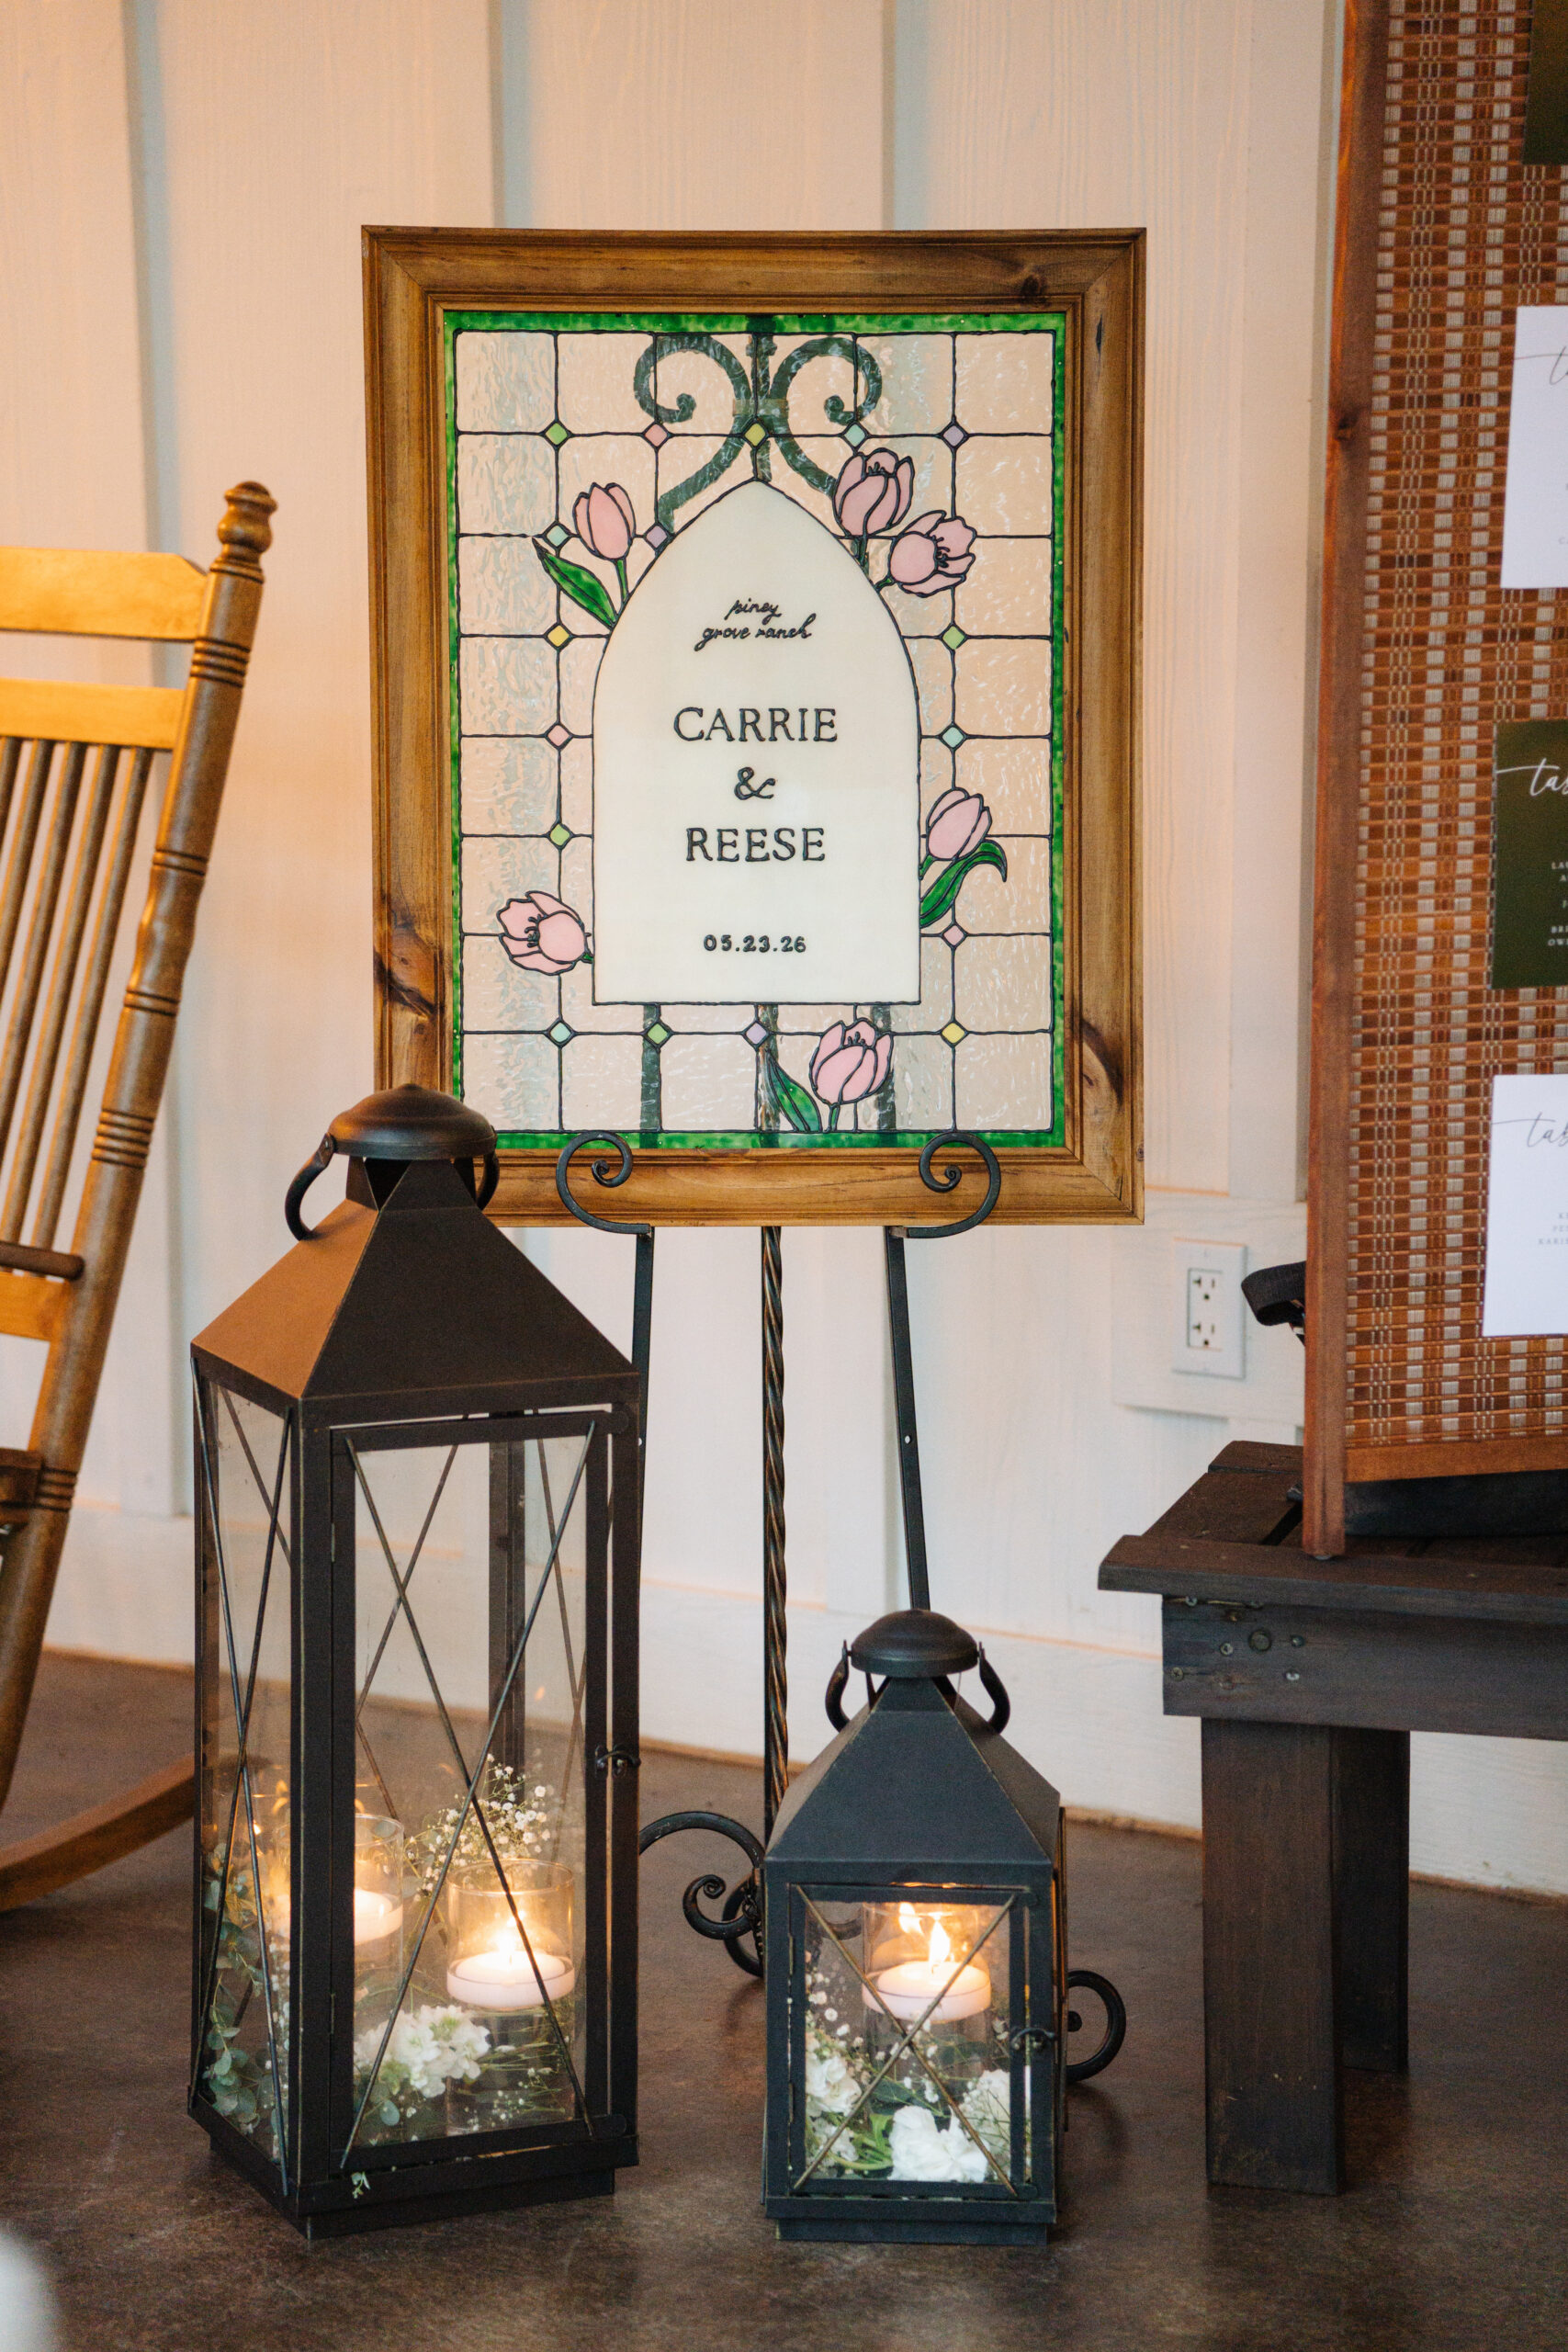
How I Made My DIY Faux Stained Glass Wedding Sign

Creating my own stained glass wedding sign was one of my favorite DIY projects. I wanted something beautiful that could be displayed on our wedding day but also become a meaningful piece of art to hang in our home afterward.
Here’s exactly how I made it.
Supplies You’ll Need
The first thing you’ll need is a frame. I used an 18 x 24-inch frame from Hobby Lobby, which I found on sale for $26.
For the stained glass effect, I used Gallery Glass paint. I purchased a pack of six colors from Hobby Lobby for around $14 (it’s also available online). The most important color for this project is the black leading paint.
Gallery Glass does sell the black leading in a larger bottle, but I highly recommend using the smaller bottle that comes in the pack. The smaller applicator gives you much more control, makes writing easier, and helps prevent mistakes—especially when you’re working with smaller details.
You’ll also need some type of template. Trust me, tracing your design is so much easier than trying to freehand everything. If you can freehand, I applaud you, but that is definitely not me!
Creating the Design

I started by tracing all of the words onto the glass and then moved on to tracing every individual line in the design.
It does not need to be perfect. In fact, I think the little imperfections are what make handmade projects so special. I wasn’t overly strict with mine, so there are definitely areas where some lines are thicker or slightly uneven—but I think that adds character and makes it feel like something truly created by hand.
I designed this sign with my best friend. She isn’t currently taking orders, but she may be able to reopen her Etsy soon. For now, you can find templates on places like Etsy or create your own design.
The best part about this project is that it becomes more than just wedding decor. It turns into a piece of art you can continue enjoying in your home for years.
Adding the Paint

Once the design was complete, I flipped the sign over and started painting on the back side of the glass.
I found that painting the back while keeping the black lines on the front gave the design more depth and dimension. It also prevents you from accidentally disturbing the leading lines while painting.
For the white background, I used Snow White Gallery Glass paint. It was around $4. You could also use a regular puff paint if you prefer a more solid appearance, but I loved the softer, milky look that the Gallery Glass paint created.
A tip: buy more white paint than you think you’ll need. You will almost always need more than expected, especially if you want multiple layers or a thicker coverage.
Creating the Flowers and Pastel Colors
For the flowers and color detailing, I used squeeze bottles from Amazon along with:
Bright White Gallery Glass paint
Rosy Pink Gallery Glass paint
Ivy Green Gallery Glass paint
I mixed the pink with white to create the shade I wanted, and I did the same thing with the other pastel colors.
The premade pastel colors didn’t dry exactly how I wanted them to—they became much darker once they dried. I highly recommend mixing small test amounts first and letting them dry before committing to a color.
The colors I created included:
Sunflower mixed with Bright White
Aqua mixed with Bright White
Lavender mixed with Bright White
Emerald Green mixed with Bright White
The only color I used straight from the bottle was Ivy Green, which I used for the stems, leaves, and border.
Fixing Mistakes (Because They Happen!)

When painting the white background, be careful around your black lines. I accidentally overlined some areas, and funny enough, I made the exact same mistake the last time I created one of these signs.
I’m not sure if the paint expands slightly as it dries or if it’s just a personal problem, but it’s something to watch out for.
If it happens to you, don’t panic. I used a steak knife and a razor blade to carefully cut through the excess white paint and peel it away.
Just be careful because you’re working on glass, and removing paint around detailed lines can be stressful. Learn from my mistake and try to leave yourself some extra space around your lines—you can always add more paint later.
Also, make sure you’re checking your paint bottles before you start. Halfway through this project, I accidentally switched to Bright White instead of Snow White and had to fix it with another layer. For the white background, I usually do about three layers, but this time I ended up doing four because of the mistake.
And again: buy extra paint. Multiple trips back to Hobby Lobby are not fun!
Adding the Vintage Glass Effect

For the clear sections of the design, I used Clear Gallery Glass paint.
This creates that vintage glass look—it’s still transparent but has a beautiful texture and dimension. I don’t know the official technical term since I’m definitely not a professional, but it gives the glass that old-fashioned stained glass feel.
The best part is that this step is incredibly satisfying. You simply fill in every section you want to keep clear, and it’s also a great feeling because you’re almost finished!
Finishing the Border

For the final touch, I used the same Ivy Green Gallery Glass paint to complete the border around the sign.
This project was definitely a labor of love. This time, it took me about a week and a half to complete, although it could take longer if you’re being extra meticulous.

I absolutely love how it turned out. I was so proud to display it at my wedding, and I’m even more excited that it has a place in our home.
If you decide to make your own stained glass wedding sign, I hope these tips help! Let me know if you have any questions, and I’ll do my best to answer them.
Leave a Reply